Here comes the guide to the for sure toughest nation to beat the Scramble for Africa Scenario: The Zulu. The following paragraphs detail the important first steps, mistakes to avoid and strategies to apply to succeed against the invading Europeans with their overwhelming and technologically advanced military forces. Fortunately we’ve got some great unique traits awaiting. Using the Scramble for Africa Zulu strategy we will not let the Zulu be defeated like their historic ancestors. After several unsuccessful attempts (as described in the “Don’ts” below) I’ve found this reddit post roughly outlining the essentials and most of all: Showing that it’s possible to win with the Zulu.


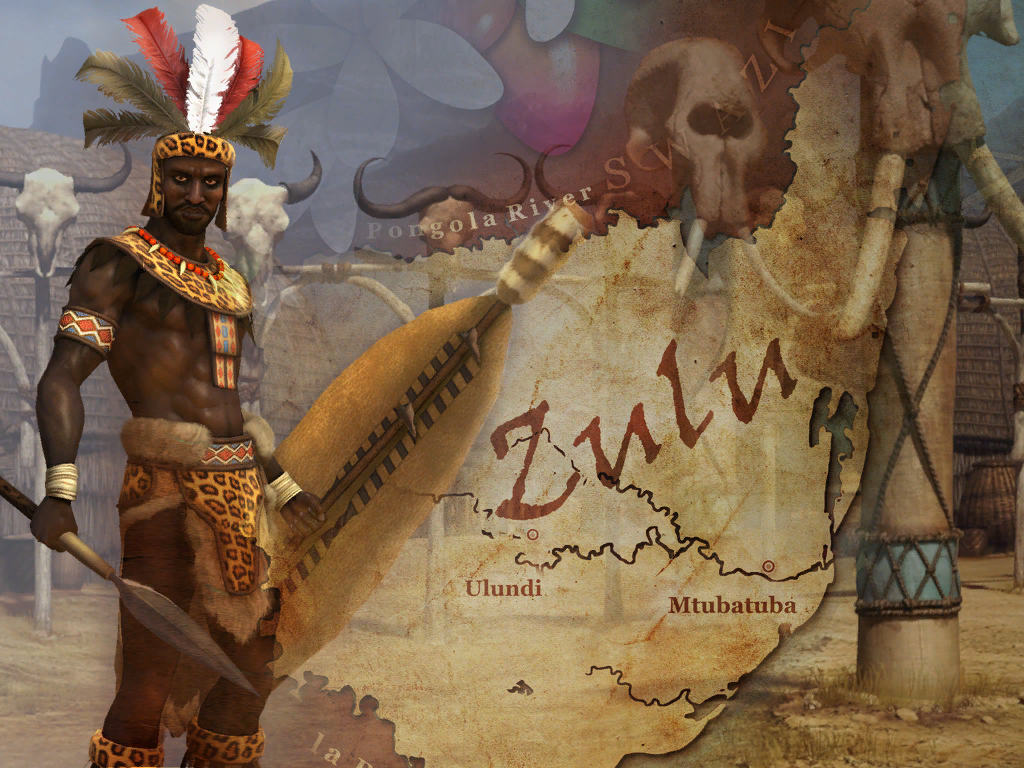
In this scenario we’re playing the Zulu, namely Cetshwayo, great-nephew of the great Zulu-king Shaka who is still being remembered and celebrated today with the annual King Shaka Day.
Cetshwayo successfully repelled the British army invading Southern Africa and later Zululand in particular. Several battles against the technologically and tactically much advanced British were won, despite a high blood price. As the Anglo-Zulu War raged, especially after the First British Invasion had been extinguished, the Zulu had a chance to roam into British (claimed) territories. Cetshwayo refused to do so, aiming at merely repulsing the British bot not provoke further retaliations. However the British returned, with overwhelming force, ending the history of a free Zulu kingdom with the Battle of Ulundi in 1879. The Zulu army dispersed and Cetshwayo became a fugitive. After being captured he was exiled to Cape Town and London for a few years. He returned to Zululand in 1882. The last king of an independent Zulu kingdom died in 1884.
We’re not gonna repeat history this time: The Scramble for Africa Zulu strategy will layout in detail how to first resist both England and Portugal, train and upskill a huge army, in order to not only win the Scramble for Africa, but actually conquer the Portuguese colonies in Southeast Africa!
Scramble for Africa Zulu Strategy – In a nutshell
Here’s the Dos and Don’ts for playing Scramble for Africa as the Zulu:
- don’t impede the Boers in settling down – they are your meat shield to the West
- build units early, mainly Crossbowmen, focus on culture buildings later
- use citadels for offense and defense
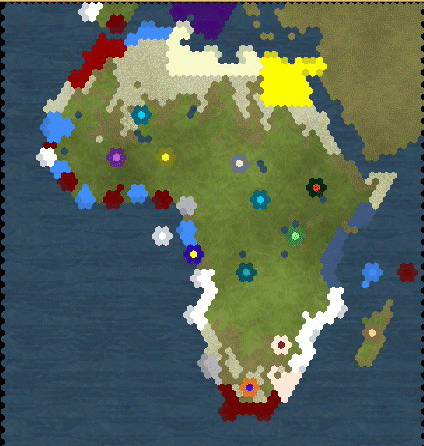
What also helps is a nice defensible position, meaning central South African land that is ideally shielded from the coast by a long stretch of mountains. For example my Initial Zulu save game.
Mistakes to avoid playing the Scramble for Africa as Zulu
The first mistake is to grab too much land. It’s a tempting one, since in some maps the land seems quite fortunate: Mountain range, easily defensible etc. It’s wrong for several reasons: It keeps the Boers from settling, so we have to deal with all of the Europeans. At the same time we spread our initial army too thin and lose units. So we can’t get them promoted to veterans and weaken our long game.


Another mistake is to prefer Great Generals over Citadels. Yes, of course, the +15% combat bonus is nice. But a unit with +200% on defense in a strategically well placed Citadel, covering 6 tiles with Zone of Control is worth much more. So: Use Generals for Citadels first!


Yes, I’ve learned the hard way that land grab is wrong. I’ve repeated that mistake. Even well placed Citadels need your initial army for defense. In the third attempt I spaced out my cities much more, leaving space to the West for the Boers, but they still didn’t settle. So again it was only me dealing with Europeans coming from two fronts:


Zulu Unique Traits and Combat Tactics
Even though the Zulu score Victory Points (VP) in this scenario by Culture per turn, all their unique traits are military based. That’s great for two reasons: One being the fact that you need a strong military to defend against a never ending onslaught of English and Portuguese technologically advanced units. The second being that you actually earn culture for defeated enemies and it counts towards your VP!
- Unique unit: Impi (same as the base game).
- Bonus vs Mounted (50)
- Spear Throw: Before engaging in melee, this unit has an extra attack.
- 25% Strength bonus against Gunpowder units
- Unique building: Ikanda (same as the base game). Grants a free promotion for Impi and Swordsmen and will unlock 2 more follow up promotions:
- Buffalo Horns: +1 movement, +25% flank attack bonus, +10% defense against ranged attacks (Granted automatically)
- Buffalo Chest: +10% open terrain bonus, +25% flank attack bonus, +10% defense against ranged attacks (Requires Buffalo Horns)
- Buffalo Loins: +10% combat strength, +25% flank attack bonus, +10% defense against ranged attacks (Requires Buffalo Chest)
- Unique power: Solar Eclipse — +25% Combat bonus for units fighting technologically advanced units.
All these bonuses combined, an Impi with a base strength of 16 gets pretty powerful when attacking with at least 1 flanking unit:
- 17.5% flank attack bonus
- 15% when fighting in own territory (from Nationalism Social Policy, see below)
- 15% from another unit in an adjacent tile (from Discipline Social Policy)
- 10% combat strength from Buffalo Loins
- 15% from a nearby Great General
- 25% from Solar Eclipse
Scramble for Africa Zulu First steps
The most important success factor is a favorable map. So scout to the Northwest for mountain ranges protecting you (and the Boers) from Portugal and Germany.
Then settle Umgungundlovu (your 2nd city) in a decent spot not too far from Beira and Lourenco Marques. Too far east though and it’s too little room for maneuver against Portugal. Too far west and you’ll block the Boers. Beware: The Boers are either stupid or bugged. If you settle to far West or to close to Pretoria, chances are they won’t build another city for 10+ turns until they fiiinally realize that there’s fertile land North of both of you. To check distances and find good attack locations (hills you want to cover) for a later attack on Portugal, check out the Scramble for Africa Map.
This is why I settled Nobamba (the Zulu’s third city) in a location that denies Portugal and Germany more cities in the West and blocked the mountain range as well. Then I gifted it (!) to the Boers. For 50 turns no enemy unit attacked me from the West.


The Boers, strong enough, with 3 good first cities, were at constant peace with the Europeans throughout the entire game. I guess their initial strength, the fact that I was at war with the Europeans and their enclosed location made it undesirable for the AI to start war with them.
Zulu Build Order
| Ulundi | Umgungundlovu | Turn |
| Ironworks | Water Mill | |
| Worker | Crossbowman 2 | |
| Crossbowman 1 | ||
| Crossbowman 3 | Crossbowman 5 | 15 |
| Crossbowman 4 | ||
| Heroic Epic | Writers Guild | 20 |
| Crossbowman 6 | ||
| Caravan 1 | Amphitheater | 25 |
| Caravan 2 | ||
| Caravan 3 | ||
| Units for defense, more Caravans to ramp up the economy and finish the remaining buildings in Ulundi from then on. | 30 |
By turn 15 the Zulu army comprises of 12 Impi and 3 Crossbowmen, fairly capable to fend of the few European, mainly British and Portuguese, units until then. By turn 30 we’ll have 6 Crossbowman, ideally haven’t lost an Impi and are mostly building units with the “Morale” promotion from Heroic Epic.


Those early Crossbowmen will form the basis for your late game offense against the Portuguese or English: When the game ended, I’ve had 17 Crossbowmen, 9 of them with Logistics (fire twice per turn) and 4 of them with Range (+1 range) promotions.
Scramble for Africa Zulu strategy for Social Policies
There probably is some room for maneuver, but in all the attempts I took, only the following order and use of Social policies was successful:
| 1. Warrior Code: +15% Production training melee units, a free Great General and +50% faster generation of Great Generals | 2. Fine Arts: 50% of excess Happiness contribute to Culture per turn Turn 20 |
| 3. Nationalism: +15% combat bonus in your territory Turn 33 | 3. Genius: A free Great Person of your choice appears next to the capital |
| 5. Discipline: +15% combat strength for units with another unit in an adjacent tile | 6. Cultural Centers: +5 Culture from each Great Work |
As the free Great Person choose another Great General. Use it for the next Citadel in defense of Ulundi.
Scramble for Africa Zulu strategy to defend Ulundi
Ulundi can not be defended merely with units at the start. The number of incoming European, mainly English and Portuguese units makes this impossible. You’ll need defensible terrain AND Citadels. In my successful game here’s the order of Citadels I built:
- First I built a Citadel towards England, not too close to Port Elizabeth, but well capturing their resources and in a good defensible spot. Ideally your map features 2 lines of hills North of Port Elizabeth: One line to fortify and the Southern hills to slow down Cavalry and block line of sight for Rifled Cannons.
- The second Citadel goes on the hills towards Lourenco Marques. Again: To fortify the hills, but out firing range of the enemy Navy. This Citadel needs to be defended at all costs, because unlike the English, who come in waves, Portugal sends a steady stream of units. Once pillaged, rebuilding will be hard.
- Citadels number 3 and 4 go to the coast, covering 4 tiles of coastline which can otherwise bomb Ulundi unchallenged. These and your ever growing number of Crossbowmen will defeat the European Navies at your shores and contribute greatly to your overall score.


Bulawayo, the 3rd Zulu city, after gifting away Nobamba to the Boers, was only founded in turn 59 (!) when the pressure of incoming settlers from the North (Belgian Kongo) and East (Portuguese) was becoming unbearable. Production there is almost negligible: Some units to support offense and defense.
With that solid defense around Ulundi, I made sure almost each Crossbowman could fire every turn, gaining massive experience, leveling them up, but also scoring lots of Victory Points through culture earned. However the game stayed quite thrilling since Ethiopia was pumping out culture en masse, keeping on par with my score for very long. I ranked #1 for the first time in turn 56, but during their turn, Ethiopia always overtook me again for another 7 turns:
| Turn | Zulu | Ethiopia |
| 56 | 2203 | 2202 |
| 57 | Taking the lead for the first time… | …but Ethiopia always overtakes each turn |
| 58 | ||
| 59 | 2446 | 2397 |
| 60 | 2516 | 2470 |
| 61 | 2610 | 2553 |
| 62 | 2710 | 2639 |
| 63 | 2772 | 2743 |
| 64 | 2854 | 2846 |
| 65 | 2944 | 2921 |
| 66 | 3024 | 3016 |
| 67 | 3115 | 3092 |
| 68 | 3213 | 3171 |
| 69 | 3305 | 3249 |
| 70 | 3371 | 3334 |
| 71 | 3476 | 3430 |
| 72 | 3544 | 3521 |
| 73 | 3666 | 3612 |
| 74 | 3790 | 3703 |
| 75 | 3908 | 3790 |
Scramble for Africa Zulu strategy for conquering European colonies
Once your defense is solid and veteran Crossbowmen have not much to fire on each turn, why not turn our crosshairs to another optional, but extremely rewarding goal: Bombing and sooner or later capturing European colonies. In this game it would be possible to aim at the British as well, since from hills North of Port Elizabeth it could well be bombed. I still picked Portugal, because I wanted to connect my land East of Bloemfontein and also Lourenco Marques can only be attacked by one privateer per turn and was easier to defend.


Both England and Portugal were willing to make peace by that time. Because I was well fortified and could fend them off time and time again, I refused to make peace, but kept scoring culture-VP from killing their ships.
With a 6th Citadel supporting the advance and overall 3 Great Generals supporting my troops I was able to also capture a 2nd Portuguese city. All that done on Deity difficulty:


Conclusion
The Zulus are most certainly among the top 3 most difficult nations to beat the Scramble for Africa Scenario. With 7h 48min playtime it was a good duration to be engaging. The constant score race vs. Ethiopia made it quite thrilling at times. The excitement of seeing your capital bombed to shreds, defending against enemy units capturing it only by covering zones of control, is even more exciting. All the more rewarding: A final score of 7074 VP, thus the 2nd highest in all my Scramble for Africa games.


Some surprising observations of the Europeans and the way, my fellow African nations fared: As usually the Ottomans were gone in less than 10 turns. Italy however proved either unable or unwilling to capture more of Egypt than Alexandria and Suez, so Egypt stayed a land-based nation throughout the entire game. France, unconstrained by the action of a human player in North Africa (regardless of the civilization played by said human) made short work of Morocco who fell incredibly early. The Boers survived alongside me, while of course Ethiopia didn’t lose a single city. Quite the contrary actually: A rare occasion, Ethiopia founded 7 cities. The map was so fortunate for them that they had the usual three Natural Wonders inside their borders and stayed well isolated from European intruders. Still beating them in score was quite a remarkable accomplishment.
A quick update: I finally managed to crack the scenario as the Zulus on deity this evening. It was an absolutely wild game: I managed to score 8564(!) points by conquering all the way up to Mozambique, while the Italian AI took the Ethiopians down to a single city.
I just wanted to say thanks so much for your guide. Although I didn’t stick to your strategy (nor the strategy in the reddit post you linked), I’m not sure I could have done it without being inspired your blog post in the first place!
That’s 12/12 complete on deity for me now, so I’ll be taking a break from Civ over the next few days. Looking forward to reading about your win as Morocco soon!
Wow! That’s impressive! The span of what can happen in this scenario is impressive. I’ve never seen an AI defeat Ethiopia in any of my games.
A friend of mine scored 9k+ playing the Boers and we’ve also tried dozens of times as Morocco. He succeeded I failed in multiple 14h+ games. Don’t have time to keep trying, so I’ll leave it at 11/12 and will still post some victorious screenshots soon in the Morocco guide.
P.S. I think your strategy of gifting a city to bulk the Boers up as much as possible is absolutely genius! I never would have thought of a tactic like this if I had a thousand years. Your game is the only game I’ve ever seen that sees them break out of their little pocket and reach towards the Congo basin, which is a really nice change 🙂
Haha, thanks! Yeah it was half inspiration half desperation. Seeing the Boers prosper and living alongside them peacefully for the entire game was really great. 😀
I’d have never thought it is possible to, but you did it!
Since i see that you are running out of scenarios, i suggest a fanmade Wonders of the Ancient World Deluxe, which greatly improves the original scenario!
Hehe, this one you mean? The Wonders of the Ancient World Deluxe
I’ll leave that to other players. I still have 2 more items on my to-do list until I have won each Civilization V Scenario with each playable Civ on Deity. Those two are the Celts and Western Rome in Fall of Rome.
Bravo on beating this scenario as the Zulu, what an incredible achievement! I’ve been following your Civ V posts for years now, ever since I found your guide on the Mongol scenario.
Coincidentally, I’ve also revisited the Scramble for Africa scenario this year, and I’m determined to beat the scenario with every nation on deity. Like you, I’m currently sitting on 11/12: however, my Achilles heel has been the Zulu rather than Morocco, so I’m hugely encouraged now that I’ve seen that it is possible! Maybe I can pay you back with some thoughts on Morocco 🙂
You’re a much better player than myself, so you may find another approach to winning as Morocco. But I couldn’t make the scenario work without wiping out Italy’s coastal territories and completely wiping out Ethiopia. My final score was 4086: in second place was the Ottomans on ~3500. Before Ethiopia was wiped out, they were sitting on ~5000.
The start of the game was about setting up my base of five cities and protecting the Ottomans. In the first turns, I produced caravans, to get five internal production trade routes. Then I produced rifled cannons and an ironclad. I also bribed Italy to war against Egypt in the first couple of turns, because I didn’t want them at war with the Ottomans, whom they usually steamroll within the first ten turns. Gibraltar fell to four rifled cannons and a patiently waiting ironclad on turn 15 or so. This small force then moved east and took Algiers by about turn 30, joined by a couple of frigates. A road running south of Algiers to Tunis also let me send a rifleman and a couple of rifled cannons to distract France’s foreign legions by ‘pincering’ Algiers.
The mid game was about wiping out Italy’s coastal territories and setting up against Ethiopia. Amassing rifled cannons on the land between Algiers and Tunis, and slowly building a force of frigates, Italy’s naval presence can be whittled away. I bombarded and took Cagliari by around turn 40 and then sold it to the Ottomans. Palermo fell by about turn 45, and I sold that to the Ottomans as well. At this point, it felt like Italy more or less gave up, which I also noticed in my game as the Ottomans. They stopped producing ships, and Catanzaro, Alexandria, and Suez all fell in fairly short order. I held onto Suez for VP and GPT, and sold everything else to the Ottomans, who were now lording over the entire Mediterranean! Suing for peace then netted 90 or so GPT from Italy. During this time, I also produced (and stole) close to a dozen workers, who built a road all the way through the African Ottoman Empire down to Ethiopia. This road ended up being three tiles wide for most of its length, to avoid some of the pathing difficulties of open borders. My defensive force around Agadir was also quite beefy by this point, consisting of a border of fortified riflemen sitting in forts, about eight rifled cannons, a garrisoned frigate and an iron clad sitting on the only coast tile next to the city. Any extra riflemen, cavalry, or rifled cannons began the long trek towards Ethiopia.
The late game, from about turn 60 or so, was all about conquering Ethiopia and selling all of the cities to the Ottomans. With only a small invading force fighting so far from home, the first step was to bribe everyone I could against Ethiopia to act as a distraction. I brokered a white peace with Belgium, so that Belgium and Italy (now an inland African nation) could join the fray. Otherwise, from here, the scenario proceeds like any other. The fighting is tough in Ethiopia, so I took the opportunity to sue for 10 turns of peace in exchange for a city as soon as it came up. I also made sure to plant any Great Generals I wanted to use before I sold cities to the Ottomans, otherwise they couldn’t be planted at all. Also, the European nations were mostly happy to sue for peace by turn 75, each for 110 GPT or so, allowing me to better reinforce my invasion force with veterans from Agadir (almost all rifled cannons were logistics promoted by this point). Around this time, I began replacing my production caravans with GPT cargo ships, and began working gold intensively in my cities. For me, Ethiopia fell in about turn 90 or so, by which time I was making about 1200 GPT and the path to victory was clear.
I hope this maybe helps! If a player like me can win as the Moroccans, I have no doubt you’ll manage. Looking forward to seeing the guide when it comes out!
Thanks for the detailed strategy! I have a successful Morocco game following the similar steps, but unfortunately I couldn’t protect the Ottomans. So had to fight through Italian-Libya. This gave me a great and strong army, but the way to Ethiopia was too long and started too late. I could only conquer one of their cities and “lost” the game on rank 2 with 4368 points vs. Ethiopias 7253 points. I had an impressive Moroccan empire spanning all over Western Africa though 😉
So there’s gonna be another try with Morocco soon to reach 12/12.
Yes, I suppose at the end of the day, RNG is still a really big factor in all of these scenarios! I was extremely fortunate that Italy decided to conquer her way through south Egypt rather than turn her gaze towards the Ottomans after conquering Alexandria and Suez. The more historically accurate Italian Libya situation is probably too much for anyone to overcome in 100 turns!