We’ve had the problem of having shitloads of newspapers piling up on our kitchen table. The underlying problem was that within those piles nobody could tell: What have I read and what do I still want to read. We were desperate for some way to organize our reading setup. What better reason to DIY (or rather do it ourselves)? Did anyone say Newspaper Rack?
It was a sunny Saturday morning and we woke up early. We had already gathered a few ideas before, but quickly became determined to solve that problem this very weekend. Here’s some of the things that inspired us:
[bws_pinterest_widget type=”board” width=”400″ height=”200″ thumbnail=”60″ url=”https://www.pinterest.de/rkalweit/wandregal-wall-rack/”]
We were primarily focused on simplicity, but also wanted something that fit the general cozy style of our kitchen. I got pens and paper and we started scribbling, because that seemed the easier way to share our ideas. And we got pretty close:


 Anja focused more on the open/close mechanism of the single pockets and overall frame, whilst I was trying to figure out what and how this needed to be done off paper. Bouncing ideas back and forth, 10 minutes later we were standing in the kitchen, measuring things and imagining a stylish wall piece instead of a messy table stack.
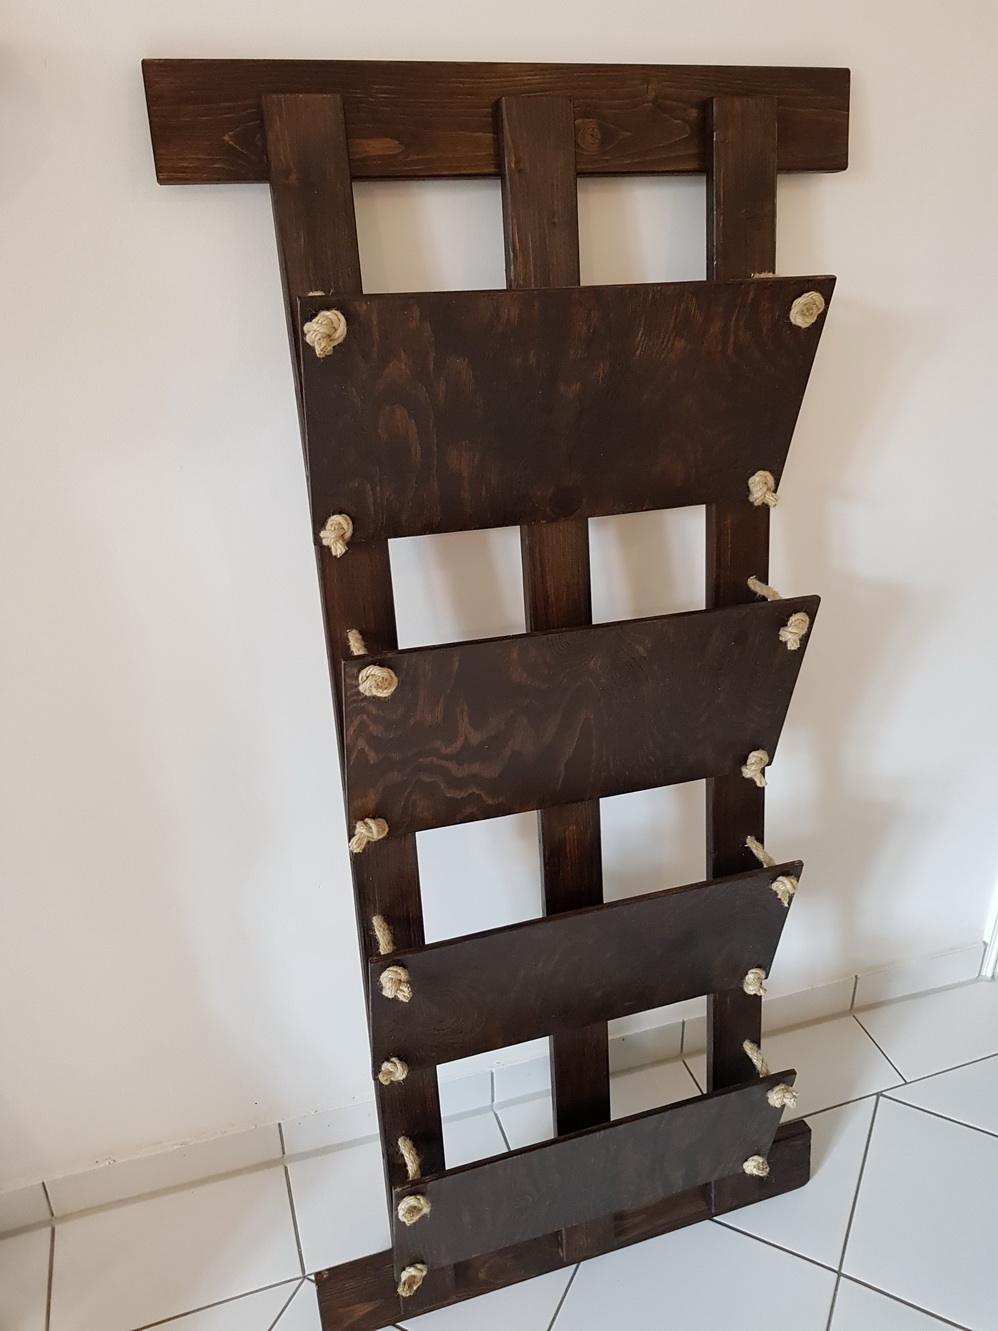
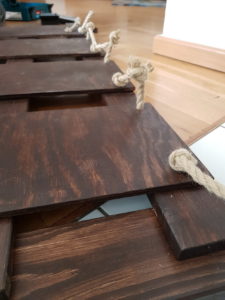
To hold the four compartments in place we started thinking about tiny chains and hinges fixating the boards. We ended up with natural ropes, which fit our style much better.
DIY Newspaper Rack Shopping List
Making a good deal on the plywood, we ended up with 45,68€ (=$55,49), which is pretty neat. For 50 bucks you normally don’t get much in any furniture store.
| Framing wood (Spruce) | 5,58€ |
| Simple planed timber (Spruce) | 4,17€ |
| Simple planed timber (Spruce) | 2,91€ |
| Plywood (Pine) | 10,00€ |
| Spleitex Natural rope, 7m á 1,29€ | 9,03€ |
| Varnish “Palisade” | 13,99€ |
As I’m relatively new to writing about DIY projects in English, please comment below if you find better suiting translations for our German shopping list:
| Rahmenholz Fichte | 5,58€ |
| Glattkant Fichte | 4,17€ |
| Glattkant Fichte | 2,91€ |
| Sperrholz Kiefer | 10,00€ |
| Spleitex Naturseil, 7m á 1,29€ | 9,03€ |
| Lasur “Palisaden” | 13,99€ |
Measurements
In DIY stores in Germany you get a lot of things done by professionals that you won’t actually have to DO YOURSELF later. Mainly: Getting things cut according to the measurements you provide. So here’s that list:
- 3 long boards á 1.3 meters (these will be the 3 main pillars of the rack)
- 3 medium boards á 68 centimeters (the top, bottom and center connections)
This leaves space for 48cm wide compartments plus 10 centimeters space on each side.
Eventually we went for ~65cm here, because this could be cut from one 2m board. - 4 panels á 48 x 22 cm
Creates enough space for really wide newspapers that sometimes hang, sometimes stand in the compartment. - 16 pieces of rope, 8 x 30 cm, 8 x 50 cm
The short pieces are for the bottom ends of the pockets, the long ones for the top (open) ends. All measurements included space for tying a knot. Lucky we did so, because we really needed it.
Construction
- Grind the surfaces and ends of all boards
- Varnish the boards (It’s a two-partners-job if you want to be quick. While one finishes the first boards smoothening, the second partner starts varnishing )- Wait for ooone long night for everything to dry
– Have great Sunday breakfast!
– Get up and do stuff!
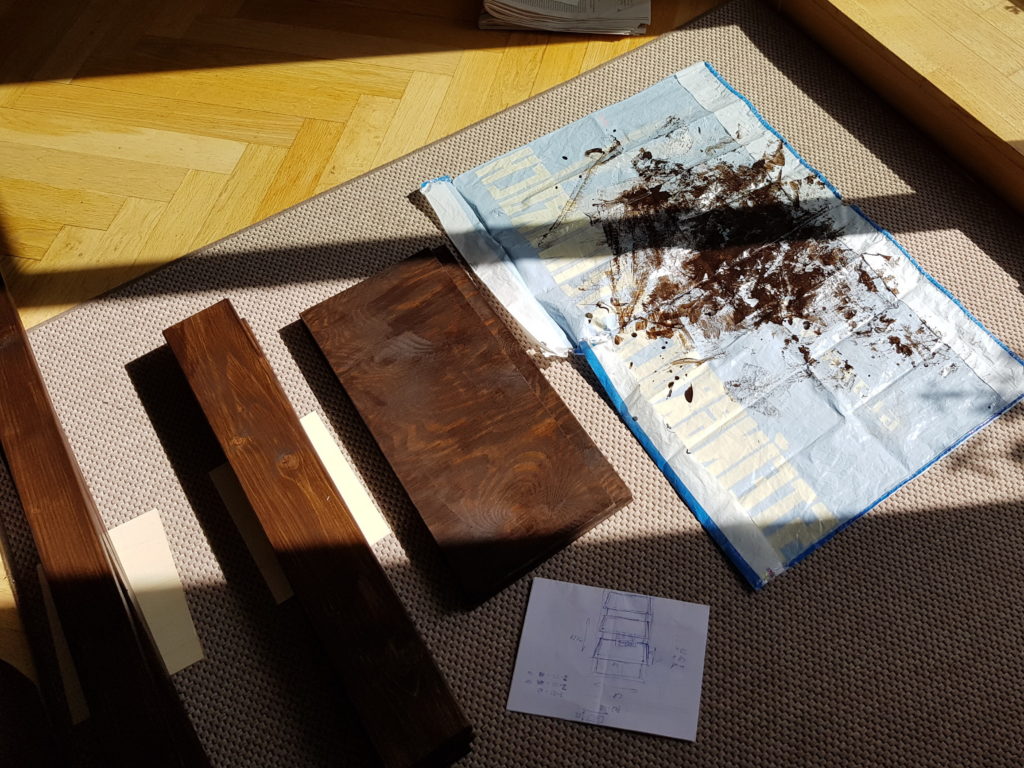
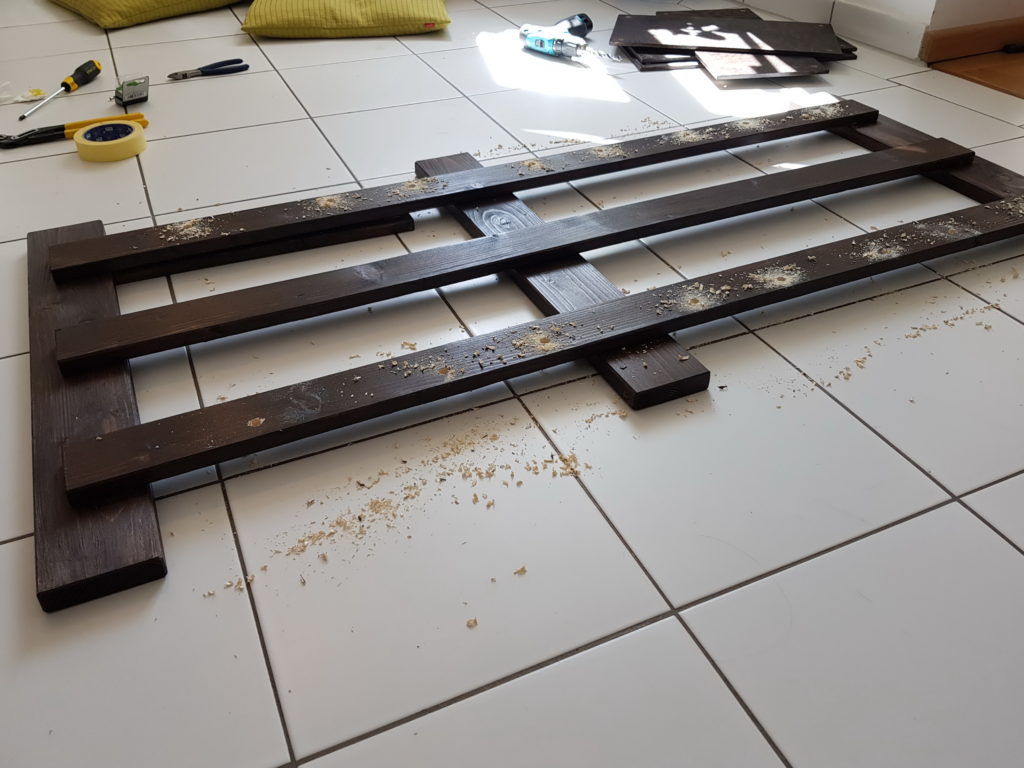
- Lay out the 3 main pillars in parallel front face down.
- Space out the connecting boards at the top, bottom and somewhere in the center.
The connecting boards are now on top of the main pillars. This is so you can put in the screws from what later will be the “behind”. This way none of the screws will be visible. We used 3,5 x 35mm screws (PZ2). This way screwing through the one 24mm thick board, you’ll still get a good 11mm+ into the back board for stability. - Fix the top and bottom, connecting the board. We used two screws for each of the connections (using only one, the whole construction might still collapse).
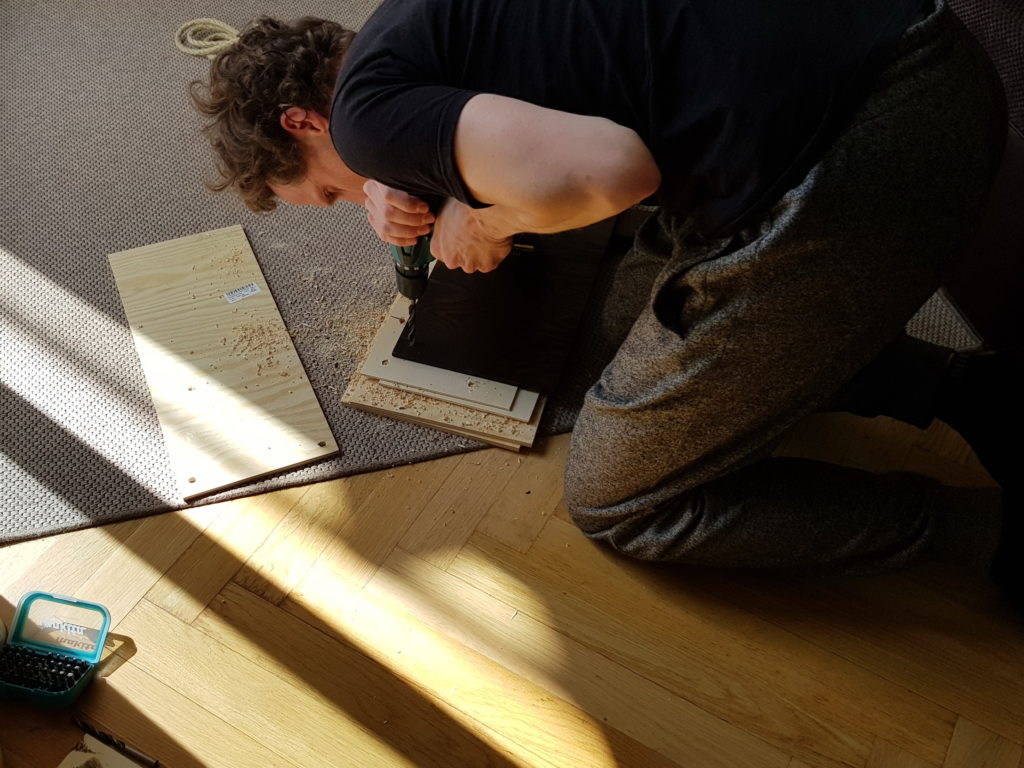
- Before screwing the center connection, loosely place the compartment-panels on the “pile of boards” roughly where you want them. You have to make sure none of the connecting boards overlaps with the panels, so you only need to drill through the main pillars to create holes for the ropes.
- Drill holes in the corners of the plywood panels. Stay away from the edges! We drilled 8mm holes 2.2cm from the top/bottom and 2cm from the left/right. (As one should always do: Put some scrap wood under the plywood, so the “exit wound” of your plywood won’t splinter.)
- Put the plywood panels on your construction again.
- Mark where you need to drill holes into the main pillars and drill those holes carefully.
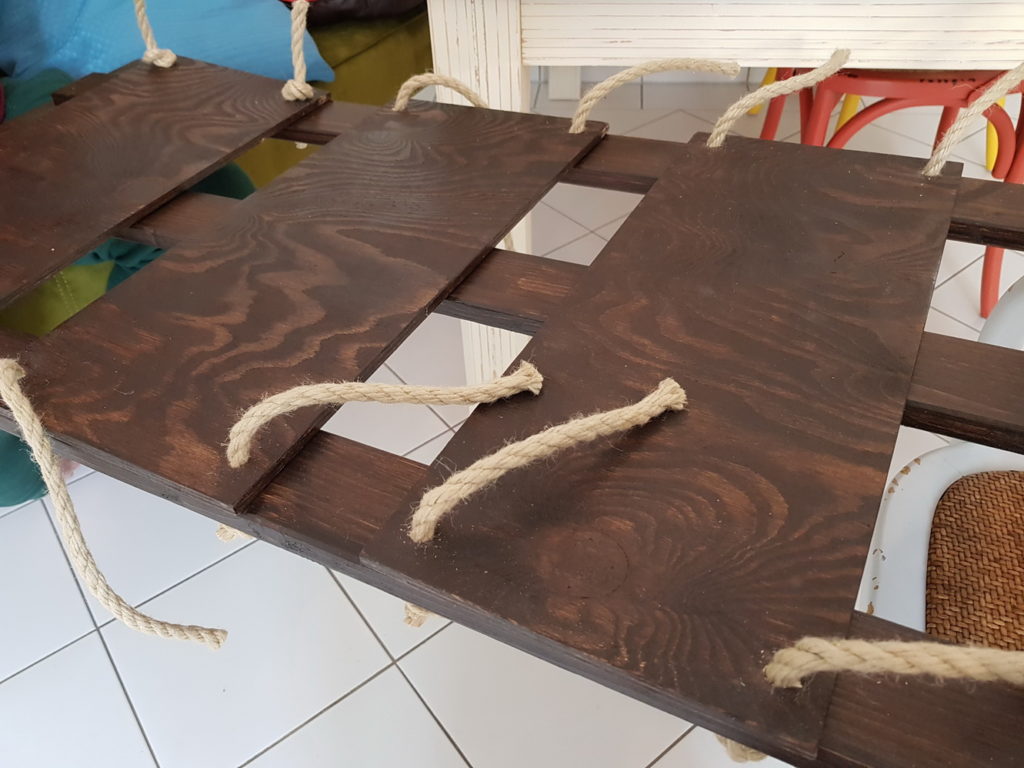
- Pull the pieces of rope through the main pillars’ holes first. Mind that the short pieces of rope have to go in every second hole, as they’ll be the bottom fixation for the panels. One strong knot at the back of the boards will hold the rope.
-
- Bring back the panels and pull the rope through the holes. The bottom knot can be very tight. No worries: Leverage effect will allow you to still pull open the compartments. Use the top knot to determine how wide open the compartment shall be. Yes, this is the shittiest part! Good news: It’s almost done now!
- Take a sharp knife (box cutter etc.) to shorten the ends of the rope where necessary. Voilà! It’s done!
- (Unless you want to screw it to the wall. In that case: Screw it to the wall! 😉 )

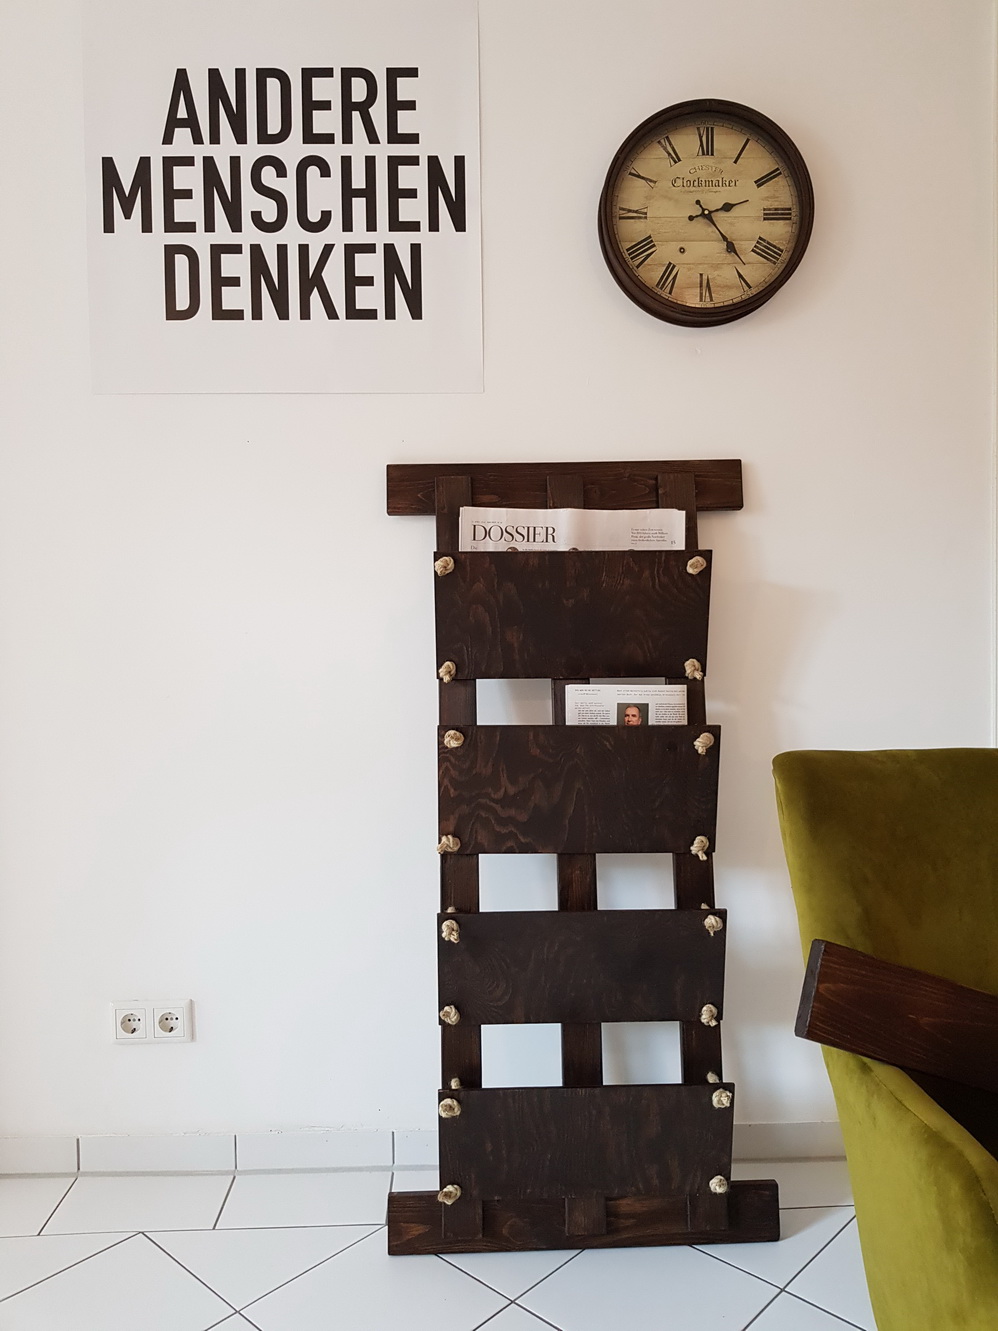
We’re both very proud now. The DIY Newspaper Rack is the third Pinterest inspired idea we have created ourselves and the kitchen feels much more homely now. There are plenty of ways this whole newspaper rack can be changed and pimped later.
In some years, when we’re bored by it (should that ever happen) we could paint the panels in some crazy colors, label them and more. Also one could use longer pieces of rope and use one of the newspaper compartments as a shelf, perpendicular to the pillars, to store things, even books (probably not too many big ones). So the whole thing is super flexible.