There’s plenty of baby activity boards for sale, by big companies and by etsy craftspeople. Inspired by some of those (awed by others) we wanted to build our own. After 10 months with baby #1 we finally did so and the result is our very special (not 100% baby safe) DIY baby activity board!
This project took place over several weekends. It can be done in one go, but obviously not with a little one crawling around while you’ll be working with all kinds of dangerous tools and small parts (lying around before being fixed to the activity board).
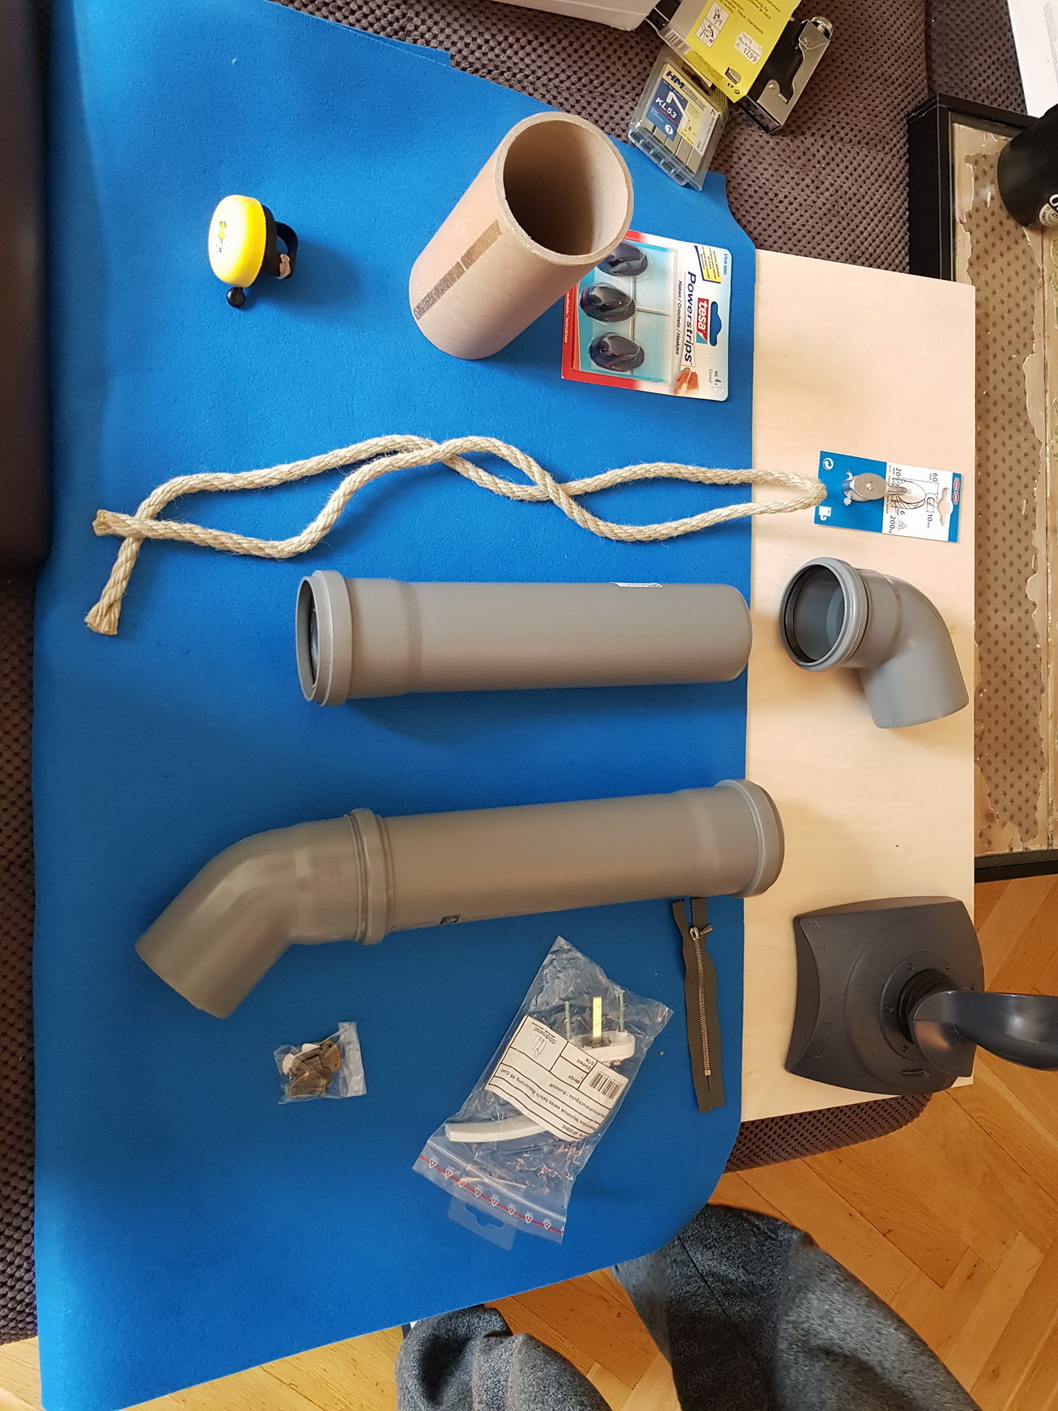
DIY Baby Activity Board Shopping List
Our shopping list is fairly simple. After all it completely depends on how you design it, so we’re gonna focus on the basics:
- From the hardware store:
- 70×70 wooden board (2x)
- 15×20 wooden board
- Hinges (2x)
- Plastic pipes (straight + bent)
- Window handle
- Cable
- Bicycle bell
- From the fabric shop:
- Cover fabric (e.g. felt) 90×90
- Funny buttons
- Zipper
Since the rest is quite self explanatory and easy-going in English, I’ll just briefly provide the shopping list in German as well:
- Aus dem Baumarkt:
- 70×70 Holzbrett (2x)
- 15×20 Holzbrett
- Scharniere (2x)
- Kunststoffrohre (gerade + gebogen)
- Fenstergriff
- Seilzug
- Fahrradklingel
- Aus dem Stoffladen:
- Bezugstoff (zB. Filz) 90×90
- Lustige Knöpfe
- Reißverschluss
All of this should cost not more than 50 bucks. Also: Check your storage room, man-cave and whatever hobby stuff you’ve got! Chances are you’ll find some things perfectly suited for your activity board like an old WiFi router (on this activity board on wanderlust) or sockets, bells and switches (on some of these boards on Etsy).


Construction
- Grind the surfaces and ends of all boards
- Slightly glue the cover fabric to the main board
- Fold it around the corners forcefully and fix it with a stapler
- Drill holes through the board where you want to attach things, take care not to drill through the fabric as the “exit wound” is gonna tear it
- Instead: Poke a pencil through the hole, see where it comes out and carefully cut the fabric with a sharp knife (box cutter etc.)


- Fix things to your board as you see fit 🙂
- Our little one loved the pipes and throwing balls through them when he was 1. Even today he’s using the window handle saying “Fresh air in!” and “Fresh air stop!”
- Attach the 2nd 70×70 board to the first one using hinges
- Space out both “legs” of your activity board and fix that maximum distance with a cord or small chain. Mind how it needs to be a good balance between the activity board being ideally vertical vs. a stable stand.
Button bonus panel
- Take the small board, grind surface and edges
- Slightly glue the cover fabric to the small board
- Fold it around the corners forcefully and fix it strong glue (attach it to the board using pegs)
- Attach buttons to it
- Fix the small board to the big board
(We didn’t do that, because we gifted the small board as part of another collaborative activity board created during a friend’s baby shower.)


Given the flexibility in attaching things to it, we’re quite happy with our DIY baby activity board. Judging from now (1.5y later) it’s been worth building it. We for sure have invested a good 4-5 hours total build time. Our son has played with it at least four times as long. Less than expected, but totally worth it. Now with baby #2 having arrived, we might soon(ish) change and extend it a bit.